I love my grandson. I really do. Even when he takes a pair of scissors to something I’ve labored over for the past few weeks. Because he inspired me to work harder on my patching skills and actually need to patch something, not just do it for fun. So here we go.
I was standing at the stove on a Saturday morning, making an omelette for breakfast, when my son-in-law came in to the kitchen, toddler in tow. “Um, Finn got into your workroom and… he cut your project…” I pushed the frying pan off the hot burner and ran upstairs. Aghast. There is was, my already late prototype for the 2019 Sashiko Four Seasons Kit for Spring. But I was so close! Almost done! And now this?
“Tell Grandma you’re sorry, Finn,” his dad said. Finn didn’t quite know what to do. He’s only two and this was a new experience for him. “Tell Grandma you’re sorry.” Unsure of how to handle this, Finn resorted to sign language, rubbing his hand across his chest. I held the little guy as one tear slid down my cheek. I saved the sobbing for later, after I got back to the stove and he was out of earshot.
I couldn’t eat. Setting the omelette aside I took a shower instead. Standing in the hot water my mind started to process all the different options I had for mending this project. What resources did I have on hand? Where were those items now and could I find them? After the shower I dressed and ate. I’d need my strength to get through this in one day. I told the family I needed to be alone for as long as possible, put in my headphones, cranked up the music, and got to work.
First, assessment of the damage.
Right across a seam. WHY?

At least the cuts were clean, right? He used my Kai scissors with the micro serrated blades.

My first challenge was to stop the bleeding, so to speak. I pulled the cut threads back a few stitches until they were long enough for me to tie off. If you’ve taken one of my classes you know I hate tying knots, but this time it was mandatory. No excuses.


I thought about how much easier it would be to use some sort of stabilizer and/or fray check type product, but I prefer to use tools that were available a century ago (ok, maybe not the micro-serrated blade scissors, but definitely scissors in general). Instead I referenced an old book of patching techniques I acquired ages ago. It’s handmade, somewhat delicate, and simply wonderful.


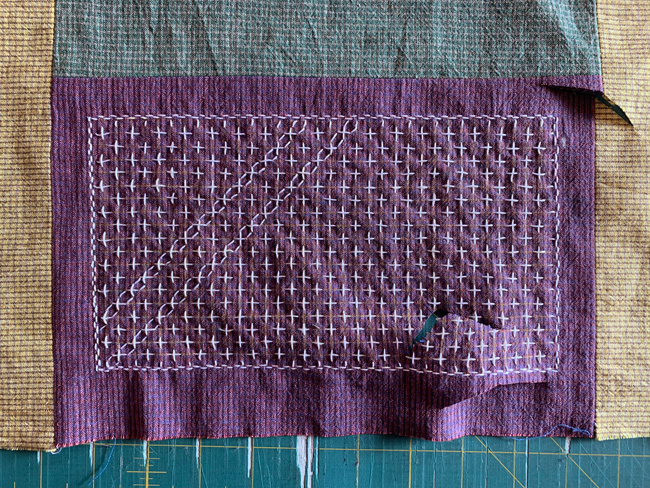
Do you see a patch in the above photo? No? Yeah, neither do I. And yet…

Here’s how it looks from the back. Self-fabric carefully aligned to match up the stripes and dark thread to baste it all together. This is how I approached the back of my project as well.

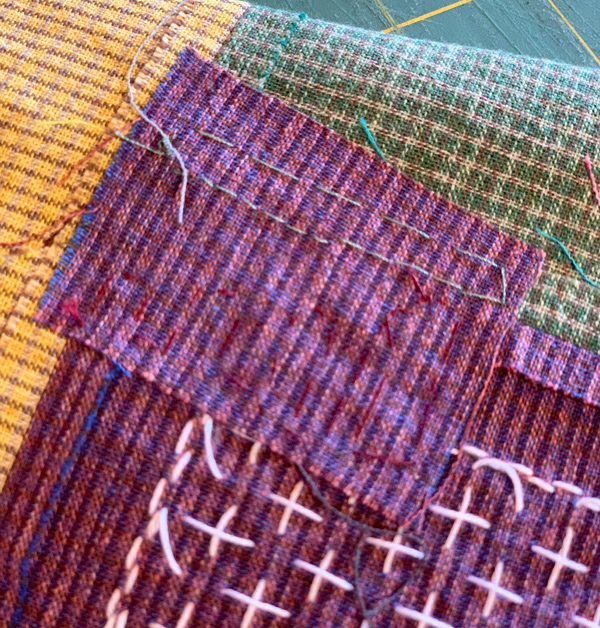
Conventional wisdom (and my mother’s sewing advice) would say to choose the darker thread (top thread on the photo below) because it’s less likely to show. However, as this yarn dyed fabric has a bright blue weft, I opted to go with a red/magenta thread (bottom) that more closely matched the warp threads. Who would know at first glance that this purple fabric had so many different colors going on?

I turned the cut edges under and stitched them very carefully onto the backing. The backing piece was anchored into place using the same tiny surface stitches and great whomping big stitches on the back that I saw in the mending book sample.

Those tiny red stitches are effectively invisible on the completed piece, even up close, but they cover every inch of the patch on the back.

Once this and the four other cuts on my project were patched, I moved on to completing the sashiko. As I’d be stitching over this one with a repeating design in thick, contrasting color thread, I needed it to be strong, but it didn’t have to be pretty.
Next I needed to fix that bit over the seam. I cleaned it up by removing a portion of the purple fabric and anchoring the backing to hold everything in place.

Green thread anchors the patch to the green fabric, and barely visible red thread onto the purple fabric again.
Here’s the completed piece. You can see the three main cuts on the lower portion of the image. The cut on the far lower far left was patched in a different way that I wasn’t happy with, which is why I didn’t mention it along with the others. I’m going to wait and see how it holds up over time and with wear and tear.

Interested in making this piece yourself (without the odd cuts, of course)? This is block #2 of our Sashiko Four Seasons set for 2019. It will be available in limited quantities in the Kimonomomo Etsy shop later this month. Questions? Let me know in the comments below.

Amazing! & true to the period. Gotta love grandchildren…..
You are saint grandmother! I respect your steadfast commitment to hard work, focus and love. Your grandson is fortunate to have you as a grandmother.
What an amazing repair job! I am impressed. I would have given up, but am glad to have learned a new skill. Thanks for sharing.
What a story !! I am totally in awe !! Well done !!
I know that feeling when you see your creation ruined !! My husband once knocked a bottle of Soya Sauce over a piece I was ironing ( perhaps crazily , on the kitchen work surface , rather than hike upstairs to where the ironing board is) … the initial devastation felt like grounds for murder … however , it was overcome with carful , bonding + painting over … 😅